
Part 1 - How to create a simple website with two levels of page hierarchy using Piston


Updates
- This tutorial was rewritten on Oct 23, 2023 to use Piston Page Designer instead of an external components host to keep it simple.
Introduction
This tutorial is the first in a series of tutorials where I will explain to you the process of creating a site with two levels of page hierarchy that has multi-level top navigation and single-level side navigation.
At the end of this series, you will have a site which has a sitemap as shown below -
Home --> Page
Administration --> Label
    Tenant Admins --> Page
    Tenants --> Page
In this tutorial we will only cover the following things -
Signing up for the Piston (Preview) environment.
Registering a frame ( roughly equivalent of a theme from other software like wordpress ).
Creating a Site.
Creating a site node (Home) of type Page under the above site.
Step 1 - Sign up
- Access the application at piston-preview.mechcloud.io and you will be greeted with a page as shown below -
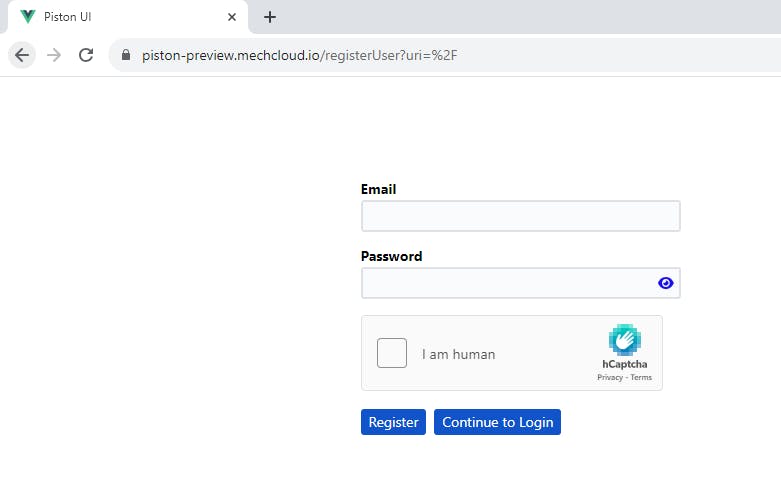
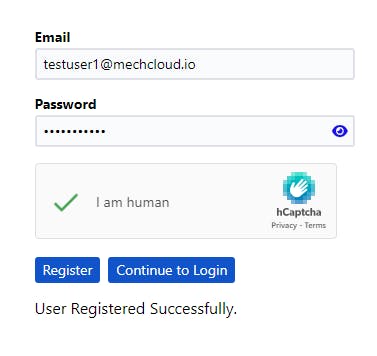
- Enter an email id and password that you want to use to create an account. Click on Register button and an account will be created for you -
Step 2 - Confirm your email id
- Check your inbox for the email id entered in the previous step and you will see an email as follows -
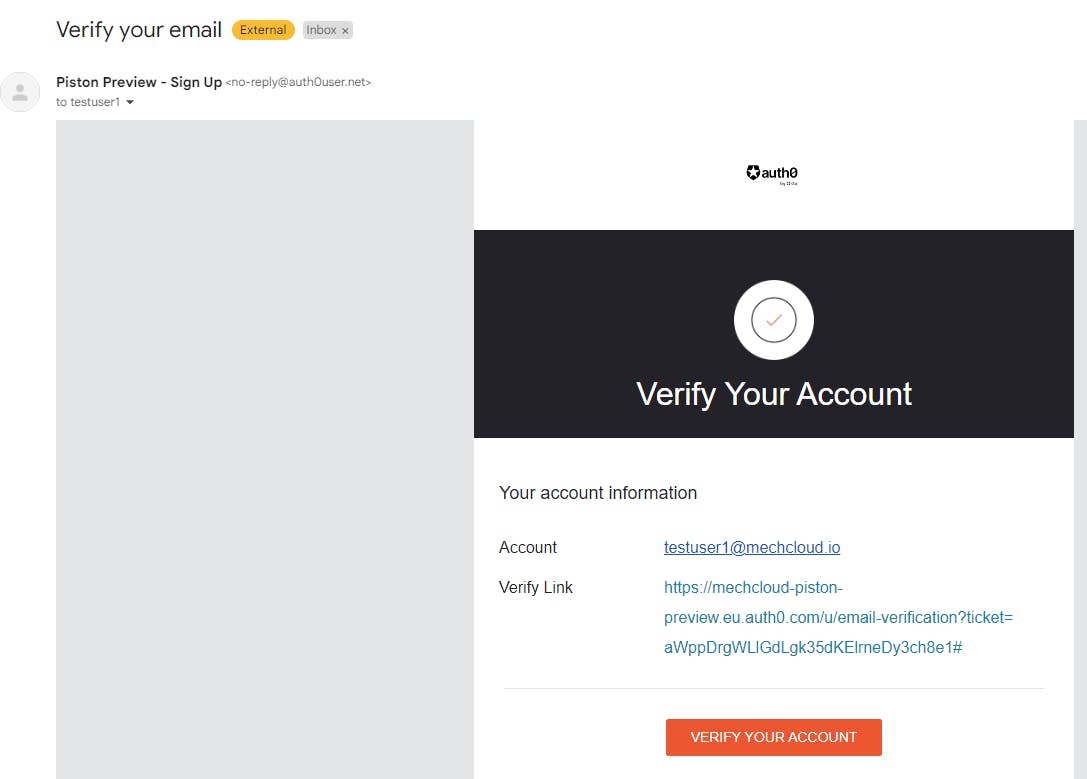
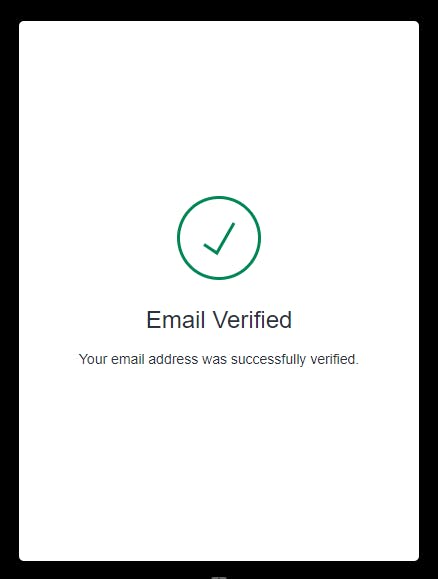
- Click on Verify Your Account button to confirm your email and you will see a confirmation as follows -
Step 3 - Register a Frame
Now again access the application at https://piston-preview.mechcloud.io and you will again see the SignUp page. This limitation is due to an issue with Auth0 which will be addressed as soon as it is fixed on the Auth0 side.
However, click on Continue to Login button this time. Enter your email id / password on the next screen and you will see the screen as follows post successful login -
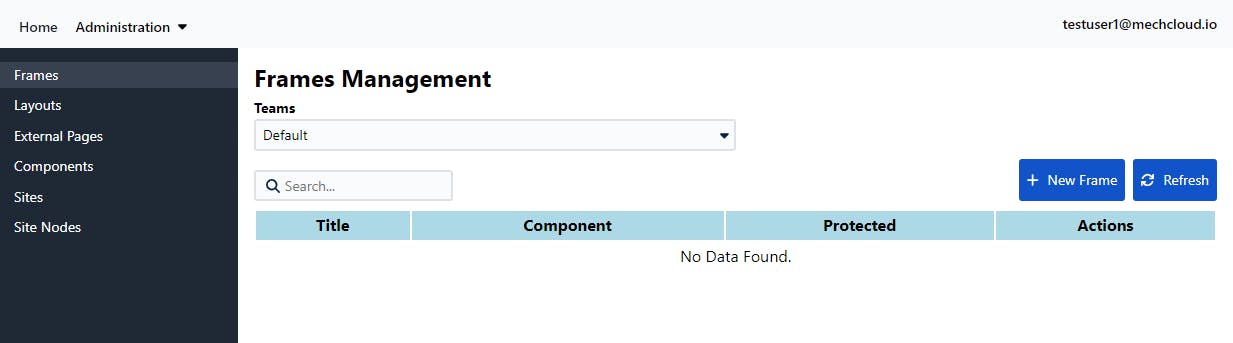
- Next, click on Administration -> Frames which will take you to the following screen -
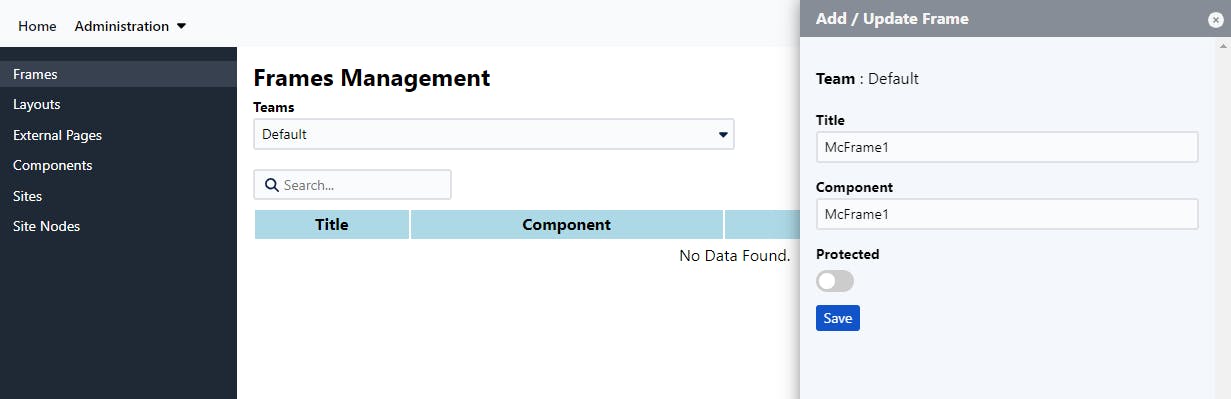
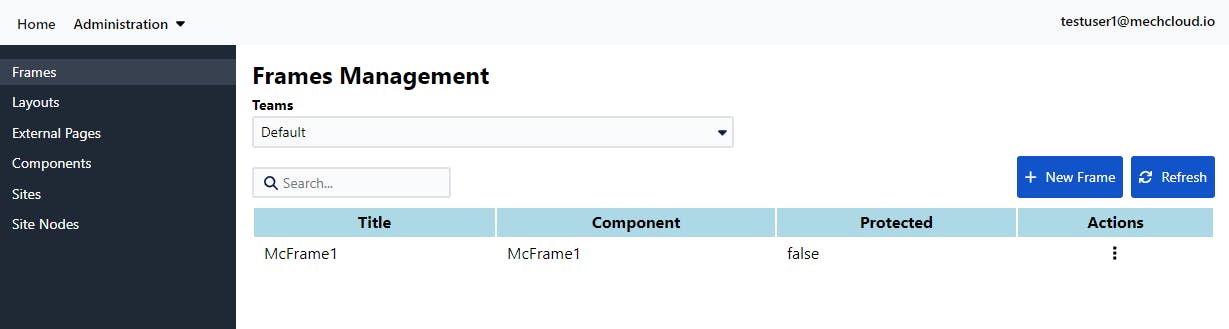
Wait till you see the Default team selected under the Teams field automatically. Now click on New Frame button and you will see a pop-up as follows.
Enter details as shown below -
Title - McFrame1
Component - McFrame1
Step 4 - Create a site
Next, go to Administration -> Sites section and create a site as shown below -
Title - Two Levels Site Demo
Mapping - mc-two-levels-site-demo
Frame - Select McFrame1 from the dropdown list
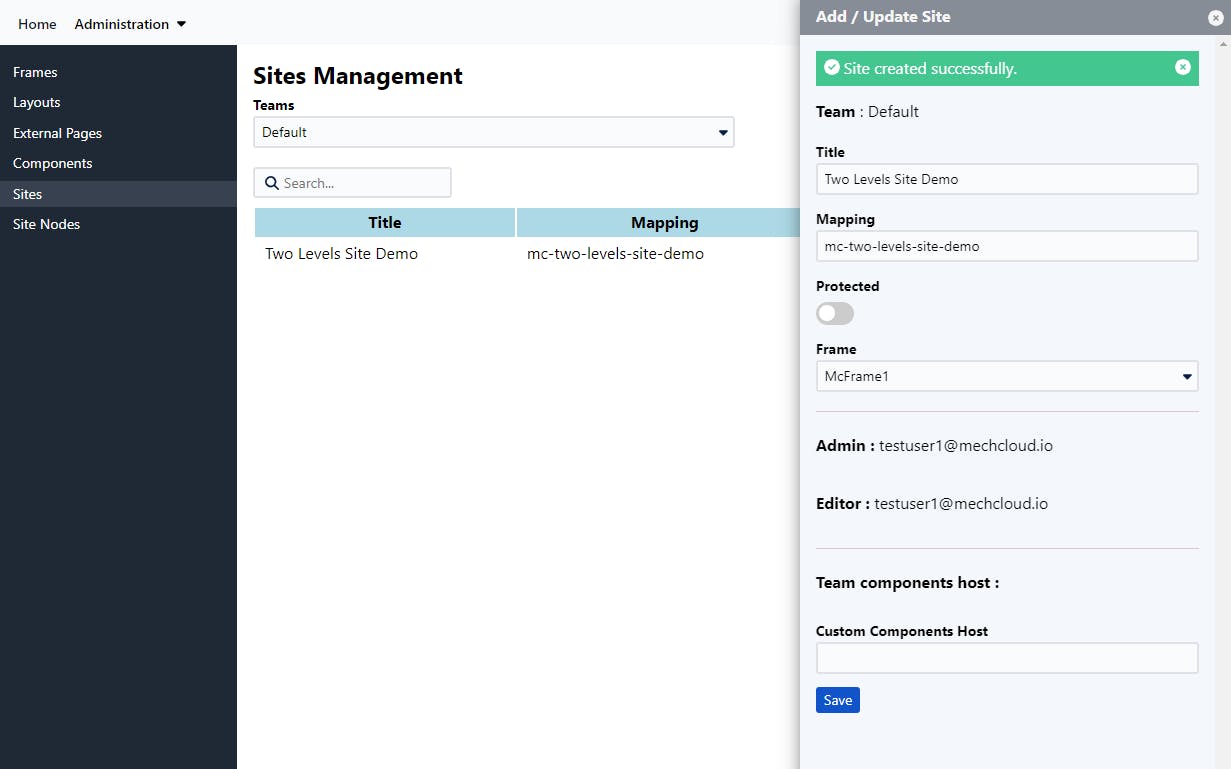
Note - Site mapping MUST be unique in a tenant (we are using Default tenant in this tutorial). At this moment it will not throw an error for the same until you submit the form. This will be addressed in a later release.
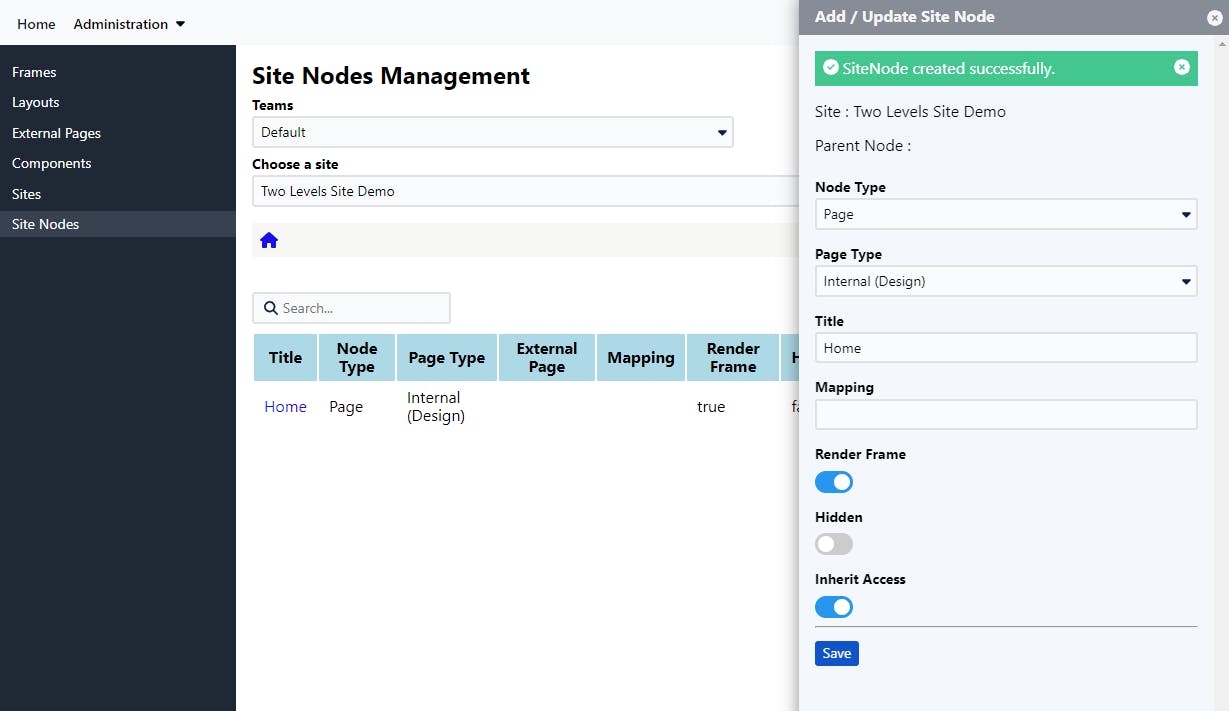
Step 5 - Create a site node for the Home page
Next, go to Administration -> Site Nodes section and create a site node for the as shown below -
Node Type - Page
Page Type - Internal
Title - Home
Mapping - Leave it blank
- Launch the page designer for the newly created page and add some content as shown in the following video -
- You now have a one-page site created successfully which you can access at piston-preview.mechcloud.io/sites/mc-two-le.. -
