Part 2 - How to create a simple website with two levels of page hierarchy using Piston


Introduction
This tutorial is the second in a series of tutorials where I will explain to you the process of creating a site with two levels of page hierarchy that has multi-level top navigation and single-level side navigation.
At the end of this series, you will have a site which has a sitemap as shown below -
Home --> Page
Administration --> Label
    Tenant Admins --> Page
    Tenants --> Page
In Part 1 of this series, we focused on creating the Home page of a site with a sitemap as shown above. In this tutorial, we will focus on creating a second root-level site node named Administration (a label) and two children nodes of type Page under it.
In Piston, you can create two types of nodes under a site or a site node - the first one is Page and the second one is Label. A label is a special type of site node which acts as a folder for children nodes under it. It can be used in the following situations -
You have a node in the top navigation which should not be clickable. E.g. for our example website when a user clicks on Administration, it will show a pop-up listing all the child pages under it instead of navigating to some page.
There is a layout (e.g. two columns) which is common across several pages. So you can put all such pages under a label, associate a layout with it and then
the layout will be inherited by all the pages under the label.
At the end of this tutorial, you will see that both the pages under the Administration label are being rendered in the right side column of a two-column layout and so we will use a layout here which we will attach to the Administration label.
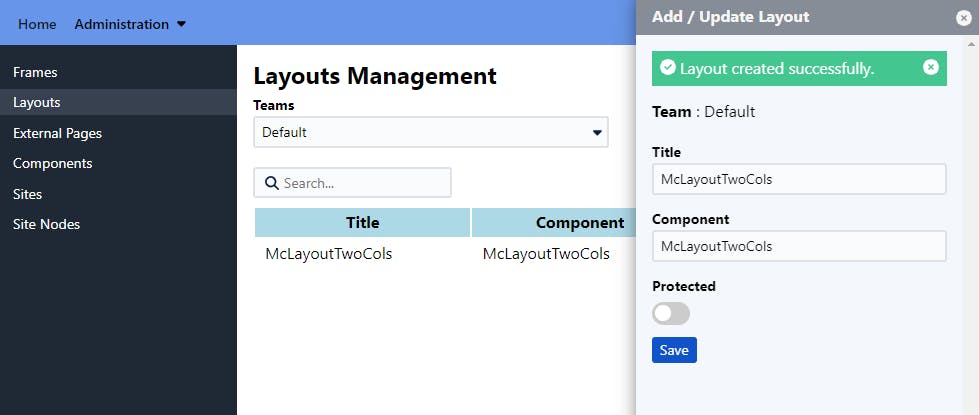
Step 1 - Register a layout
- Go to Administration -> Layouts section and register a layout named McLayoutTwoCols as shown below -
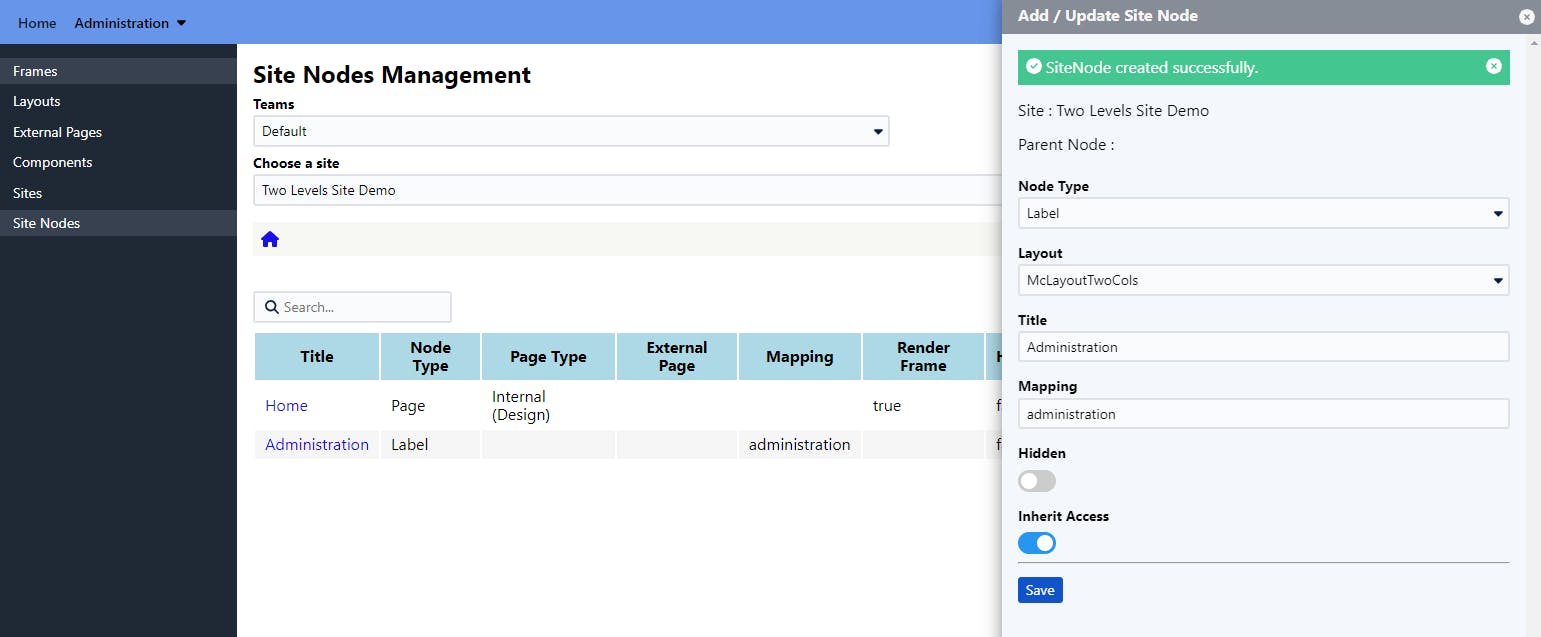
Step 2- Add a site node for Administration
Go to Administration -> Site Nodes, Select Two Levels Site Demo under Choose a Site field and create a site node Administration with the following details -
Node Type - Label
Layout - Select McLayoutTwoCols from the dropdown list
Title - Administration
Mapping - administration
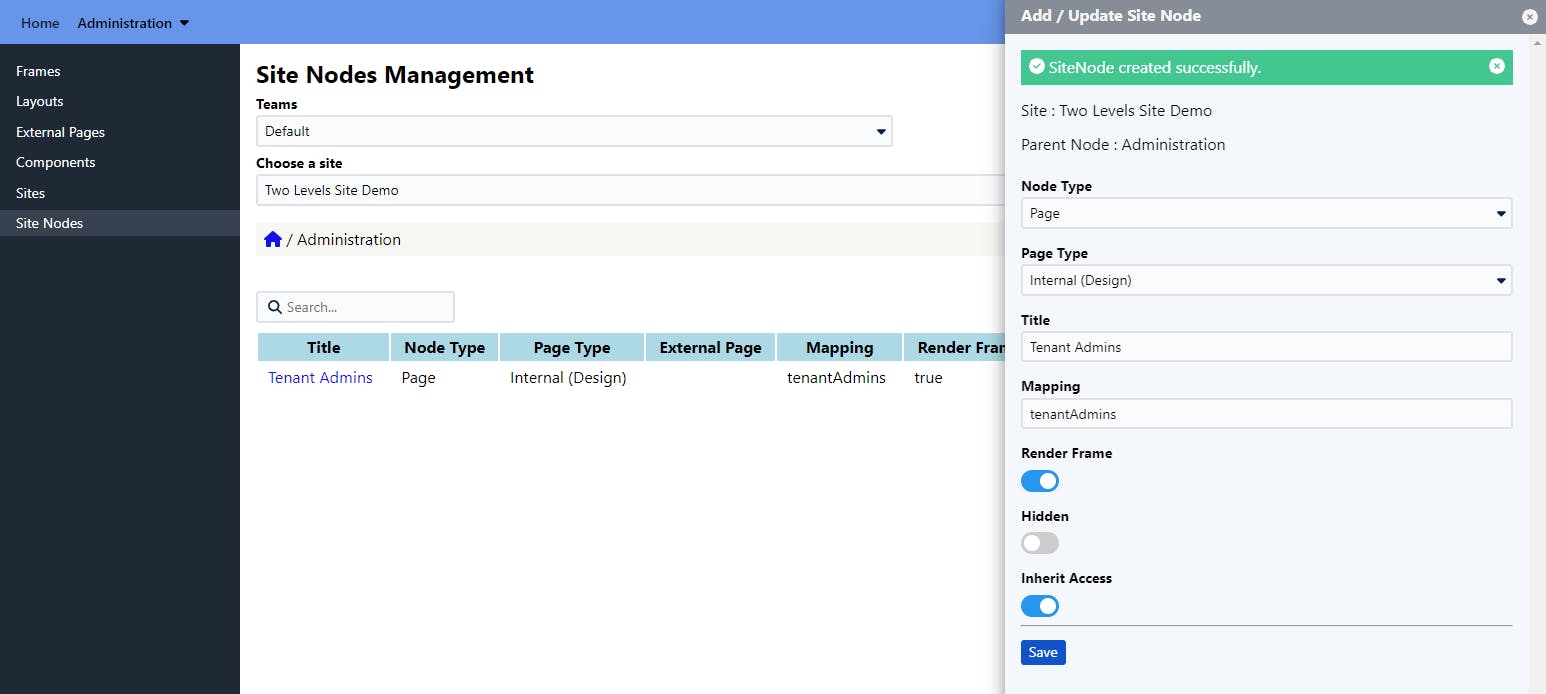
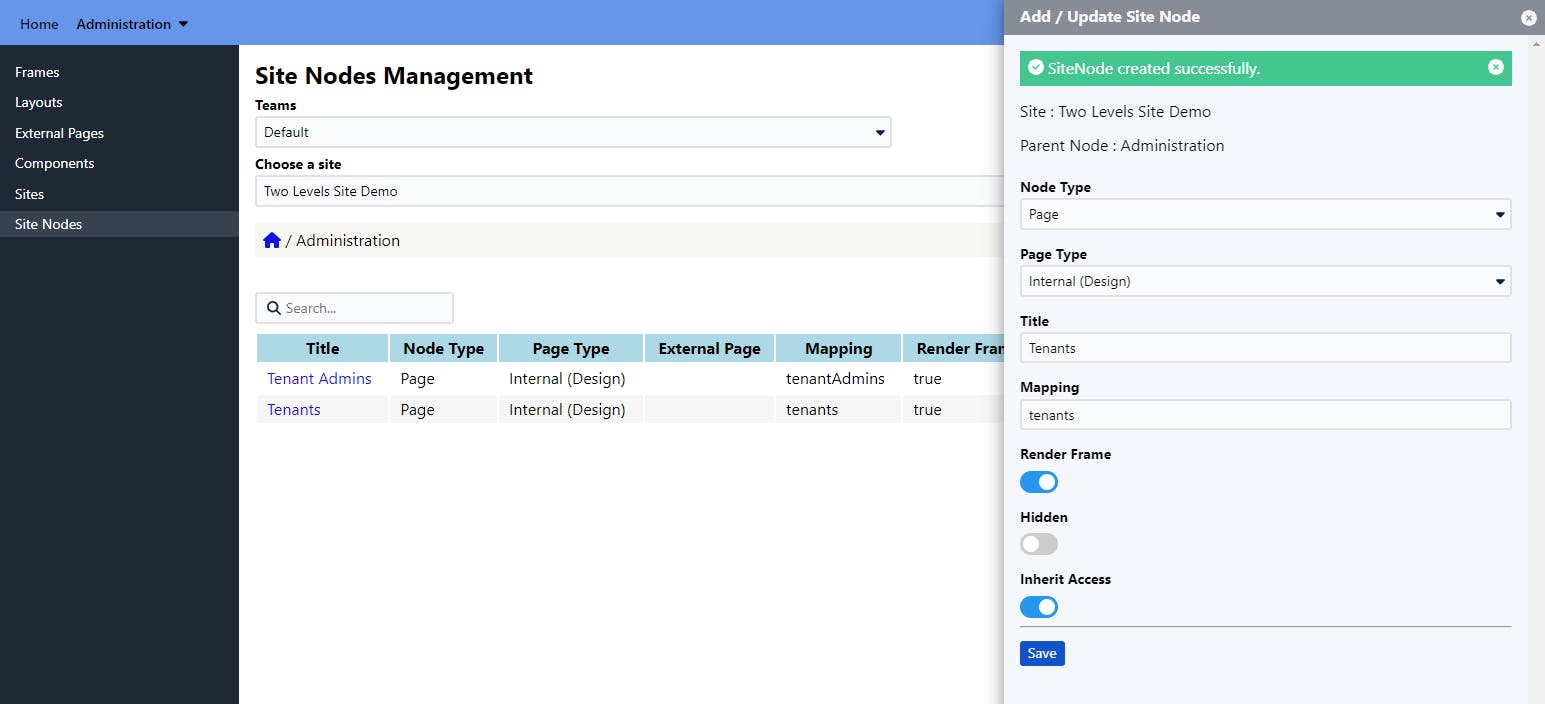
Step 3 - Add two children nodes under Administration
Now click on the Administration link under the Title column of the table and create two site nodes (Tenant Admins, Tenants) as shown below -
Node Type - Page
Page Type - Internal
Title - Tenant Admins
Mapping - tenantAdmins
Node Type - Page
Page Type - Internal
Title - Tenants
Mapping - tenants
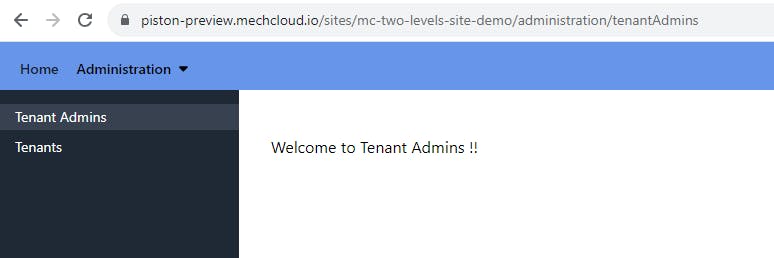
Step 4 - Add some content to newly created pages
- Use Page Designer to add some content to these pages as shown in below video -
- You can now access the updated site with Administration label and its children pages added to it at piston-preview.mechcloud.io/sites/mc-two-le.. -